
Sliding Stones to Slicing Stems — How to Maintain your Shear's Sharpness
Here at STUMP, we’ve adopted the “buy it for life” mindset. This means intentionally choosing products that stand the test of time. Think: durability, beauty, and function. We’re talking products that work! Our Hanakumagawa pruning shears are one great example of heirloom quality products that we stock. These particular shears are handcrafted in Ono, Hyōgo, Japan using a heat-treated carbon steel. With the right care and safe snipping practices, chances are your shears will have life for generations to come. Join us on a detailed walkthrough of our sharpening process.
Handling a set of shears while using oil and water can open up chances for accidents. Always be cognizant with your body, your surroundings, the blade you are actively working on, along with any passive blade(s)—being aware of your actions and surroundings is the best way to avoid bodily harm or damaging your shears.

Supplies
There are a handful of items you’ll need throughout this process:
Camellia oil, to be used as lubricant during the sharpening process and for upkeep in between your sharpening sessions
Crean mate, a rubbery pumice stone
Handheld 1000 grit sharpening stone
A vessel large enough to completely submerge your sharpening stone in water
Paper towels or clean rags
Rubbing alcohol (optional)
Preparation
Start by soaking your sharpening stone in water. You’ll notice air bubbles escaping the porous stone. Once all the air has escaped, the stone will be ready to use—this should take only a few minutes. While the stone is soaking, we will use this time to clean off any sap deposits and buff out any small rust spots on your shears.
Depending on how tarnished your shears are, you may take the option of using rubbing alcohol to begin breaking down sap deposits on the metal blades. This step is not required, as the Crean Mate will scrub it away. After you have wiped down your shears, evenly coat the blades with camellia oil. Using a firm amount of pressure, rub the Crean Mate on your shears as you would a rubber eraser on a piece of paper. Rub the Crean Mate in the same direction as the original brushed metal of your shears for a consistent appearance, and take care not to use the Crean Mate directly on the cutting edge of the blade. Periodically wipe away the oil and dirt to see how the Crean Mate is cleaning your blades. Once you are satisfied, wipe off as much oil from the blades and engage the blade of your shears to allow residual oil around the joint to escape. When no discoloration or oil escapes from the center, you can begin the sharpening process.
Sharpening
You may notice the sharpening stone has multiple working edges. Take note of the flat and concave side. We will use these for flat blades (bud shears) and curved blades (branch shears), respectively. When using the stone against the blades, there are a few things you’ll want to keep in mind. Firstly, almost no force is required when guiding the stone against the edge of the blade. Typically the weight of the stone, shears, and your hand will suffice when sharpening a set of shears. Regardless of flat or curved blades, you’ll want to utilize as much of the length of the stone as possible. This should be easy to accomplish while using smooth, even motions away from your body while sharpening.
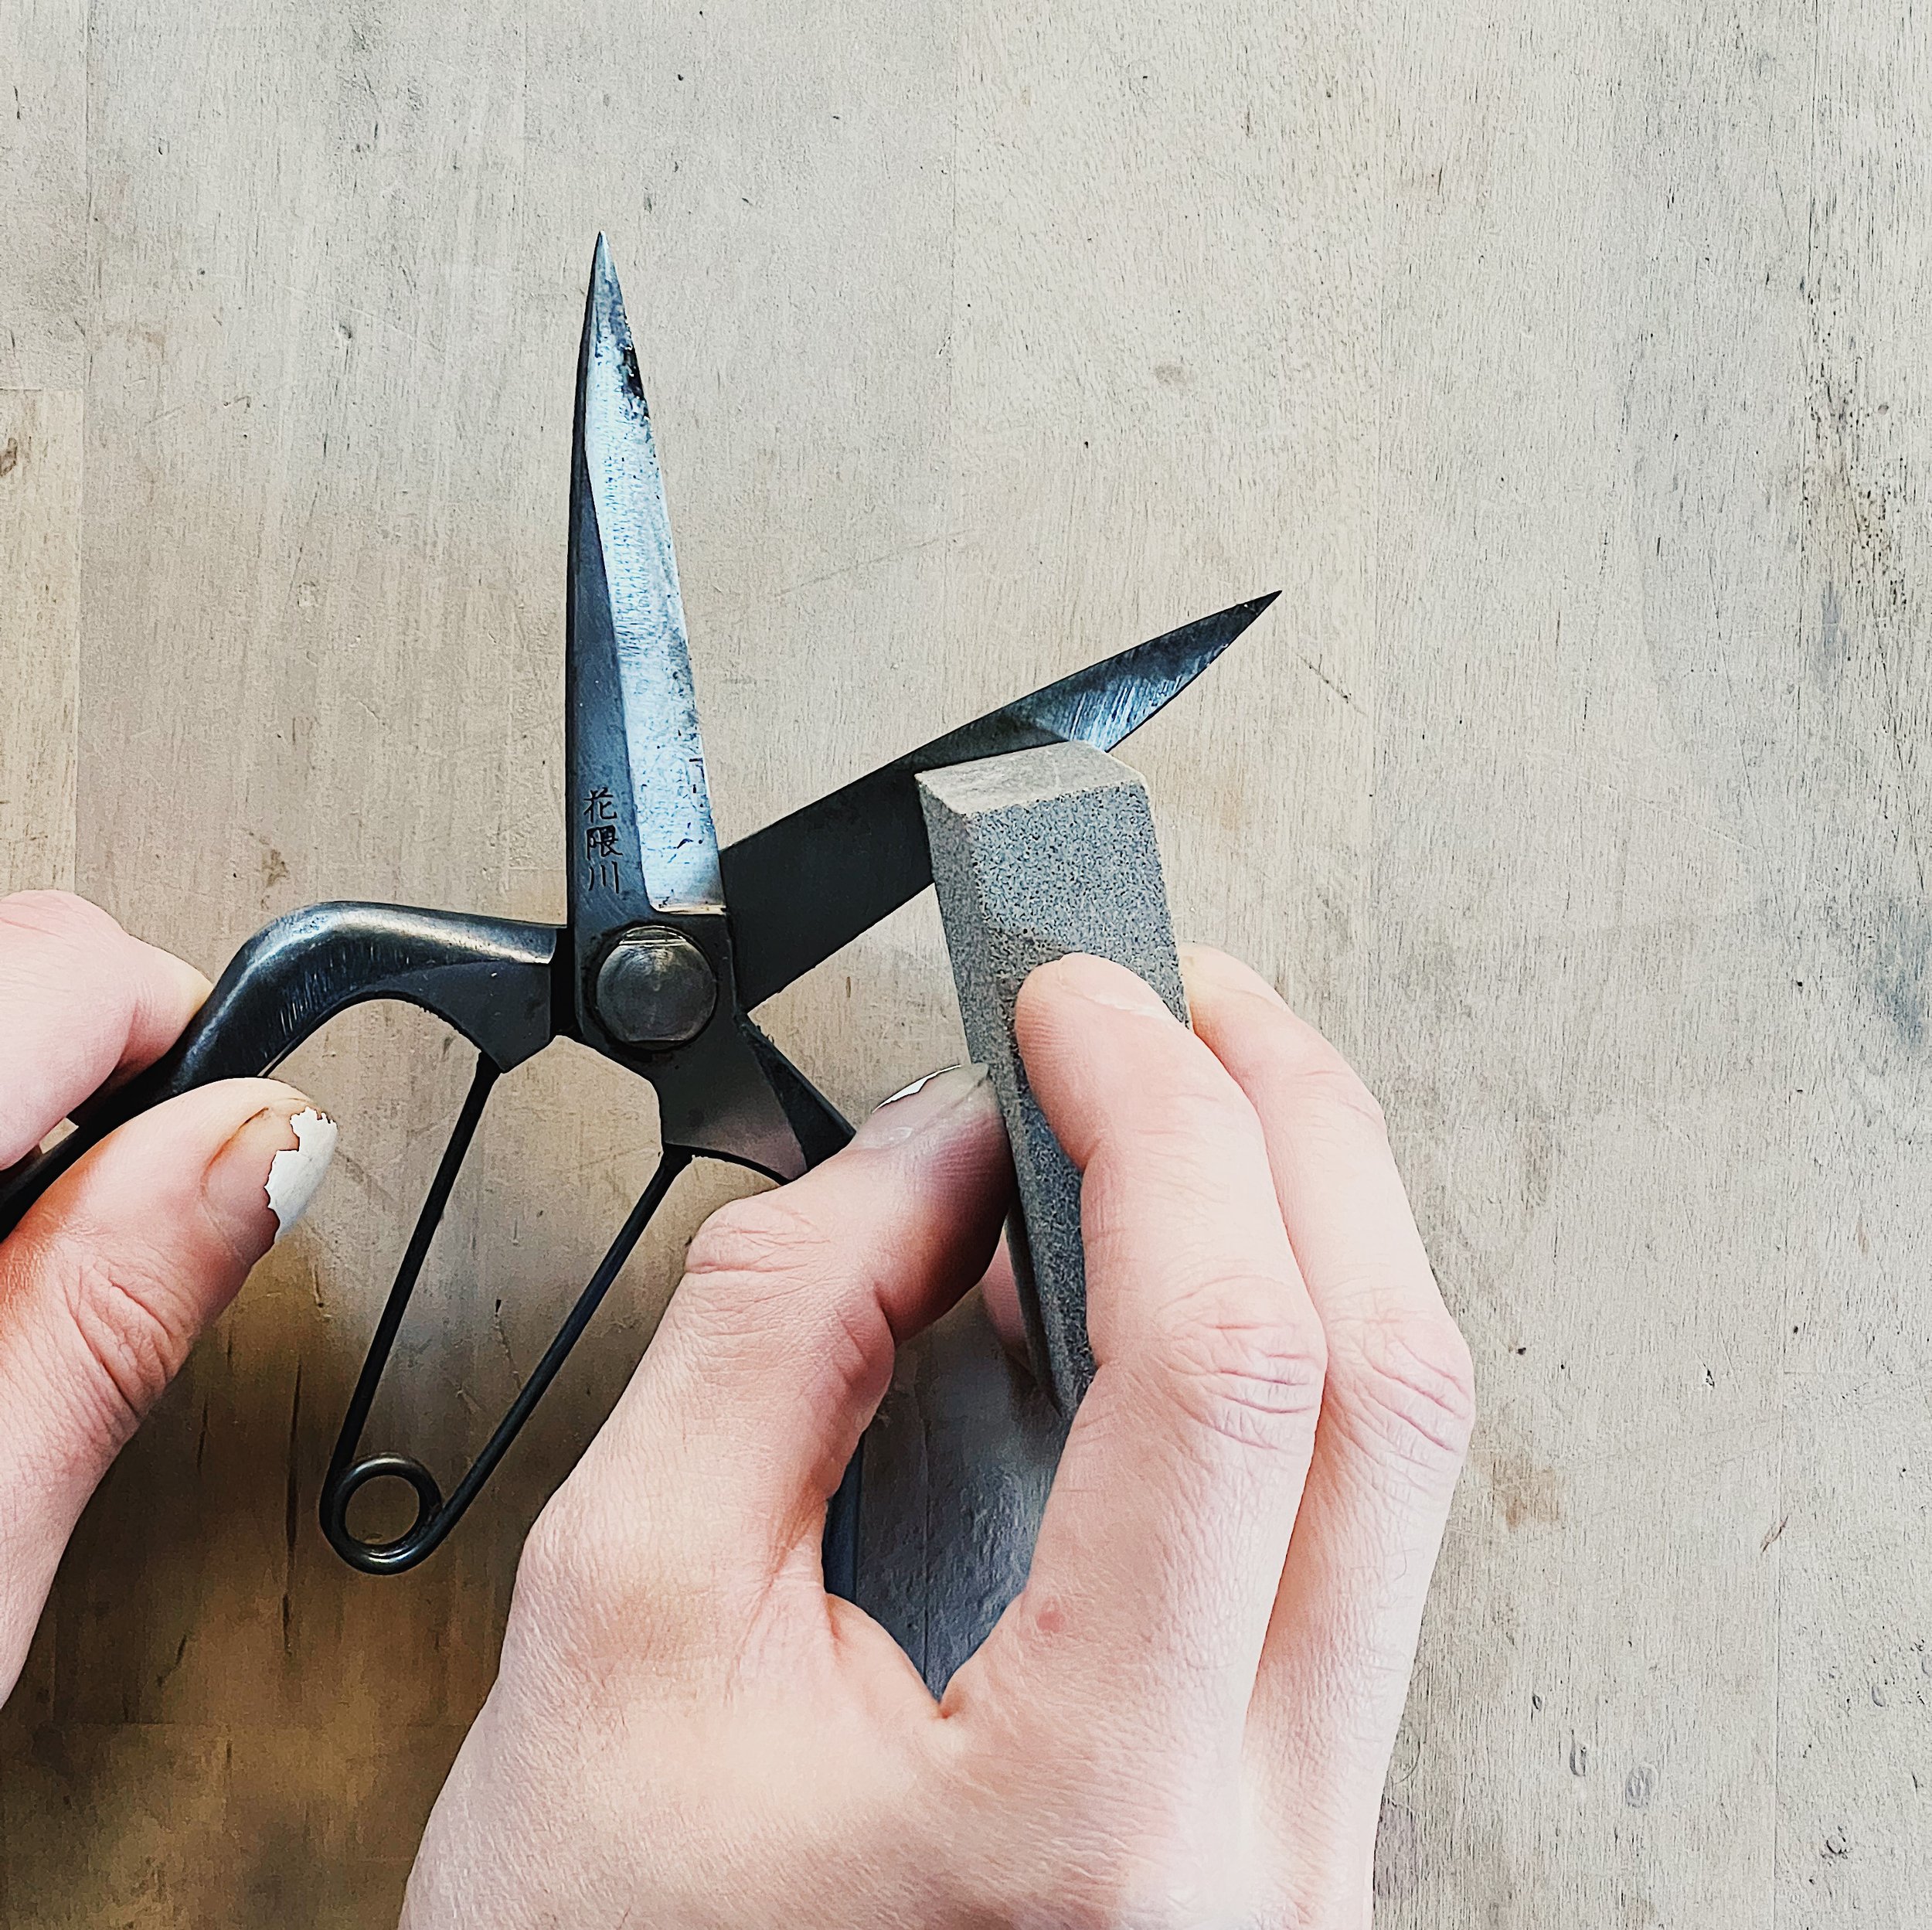
Let’s start with a set of bud shears. For this style of blade, you will use the flat edge of your sharpening stone. Guide the stone along the top cutting edge of the blade. This might look like a 15º angle between the slanted portion of the blade and the stone. The stone should only make contact with the cutting edge, not the entire surface of the metal. We like to do this in a singular motion, moving from the base of the blade to the tip and pushing away from your body before lifting the stone to start back at the base. After roughly 15-20 swipes, you may want to re-wet your stone to remove any metal shavings. After a more significant number of swipes, ≈40-50, flip the set of shears and pass the flat edge of the sharpening stone along the back of the blade gently. This will remove any hanging metal burrs before you engage the blade of your shears. Do this pass only about 1-3 times each round, as you should not sharpen the back of the blade. Repeat along other blade.

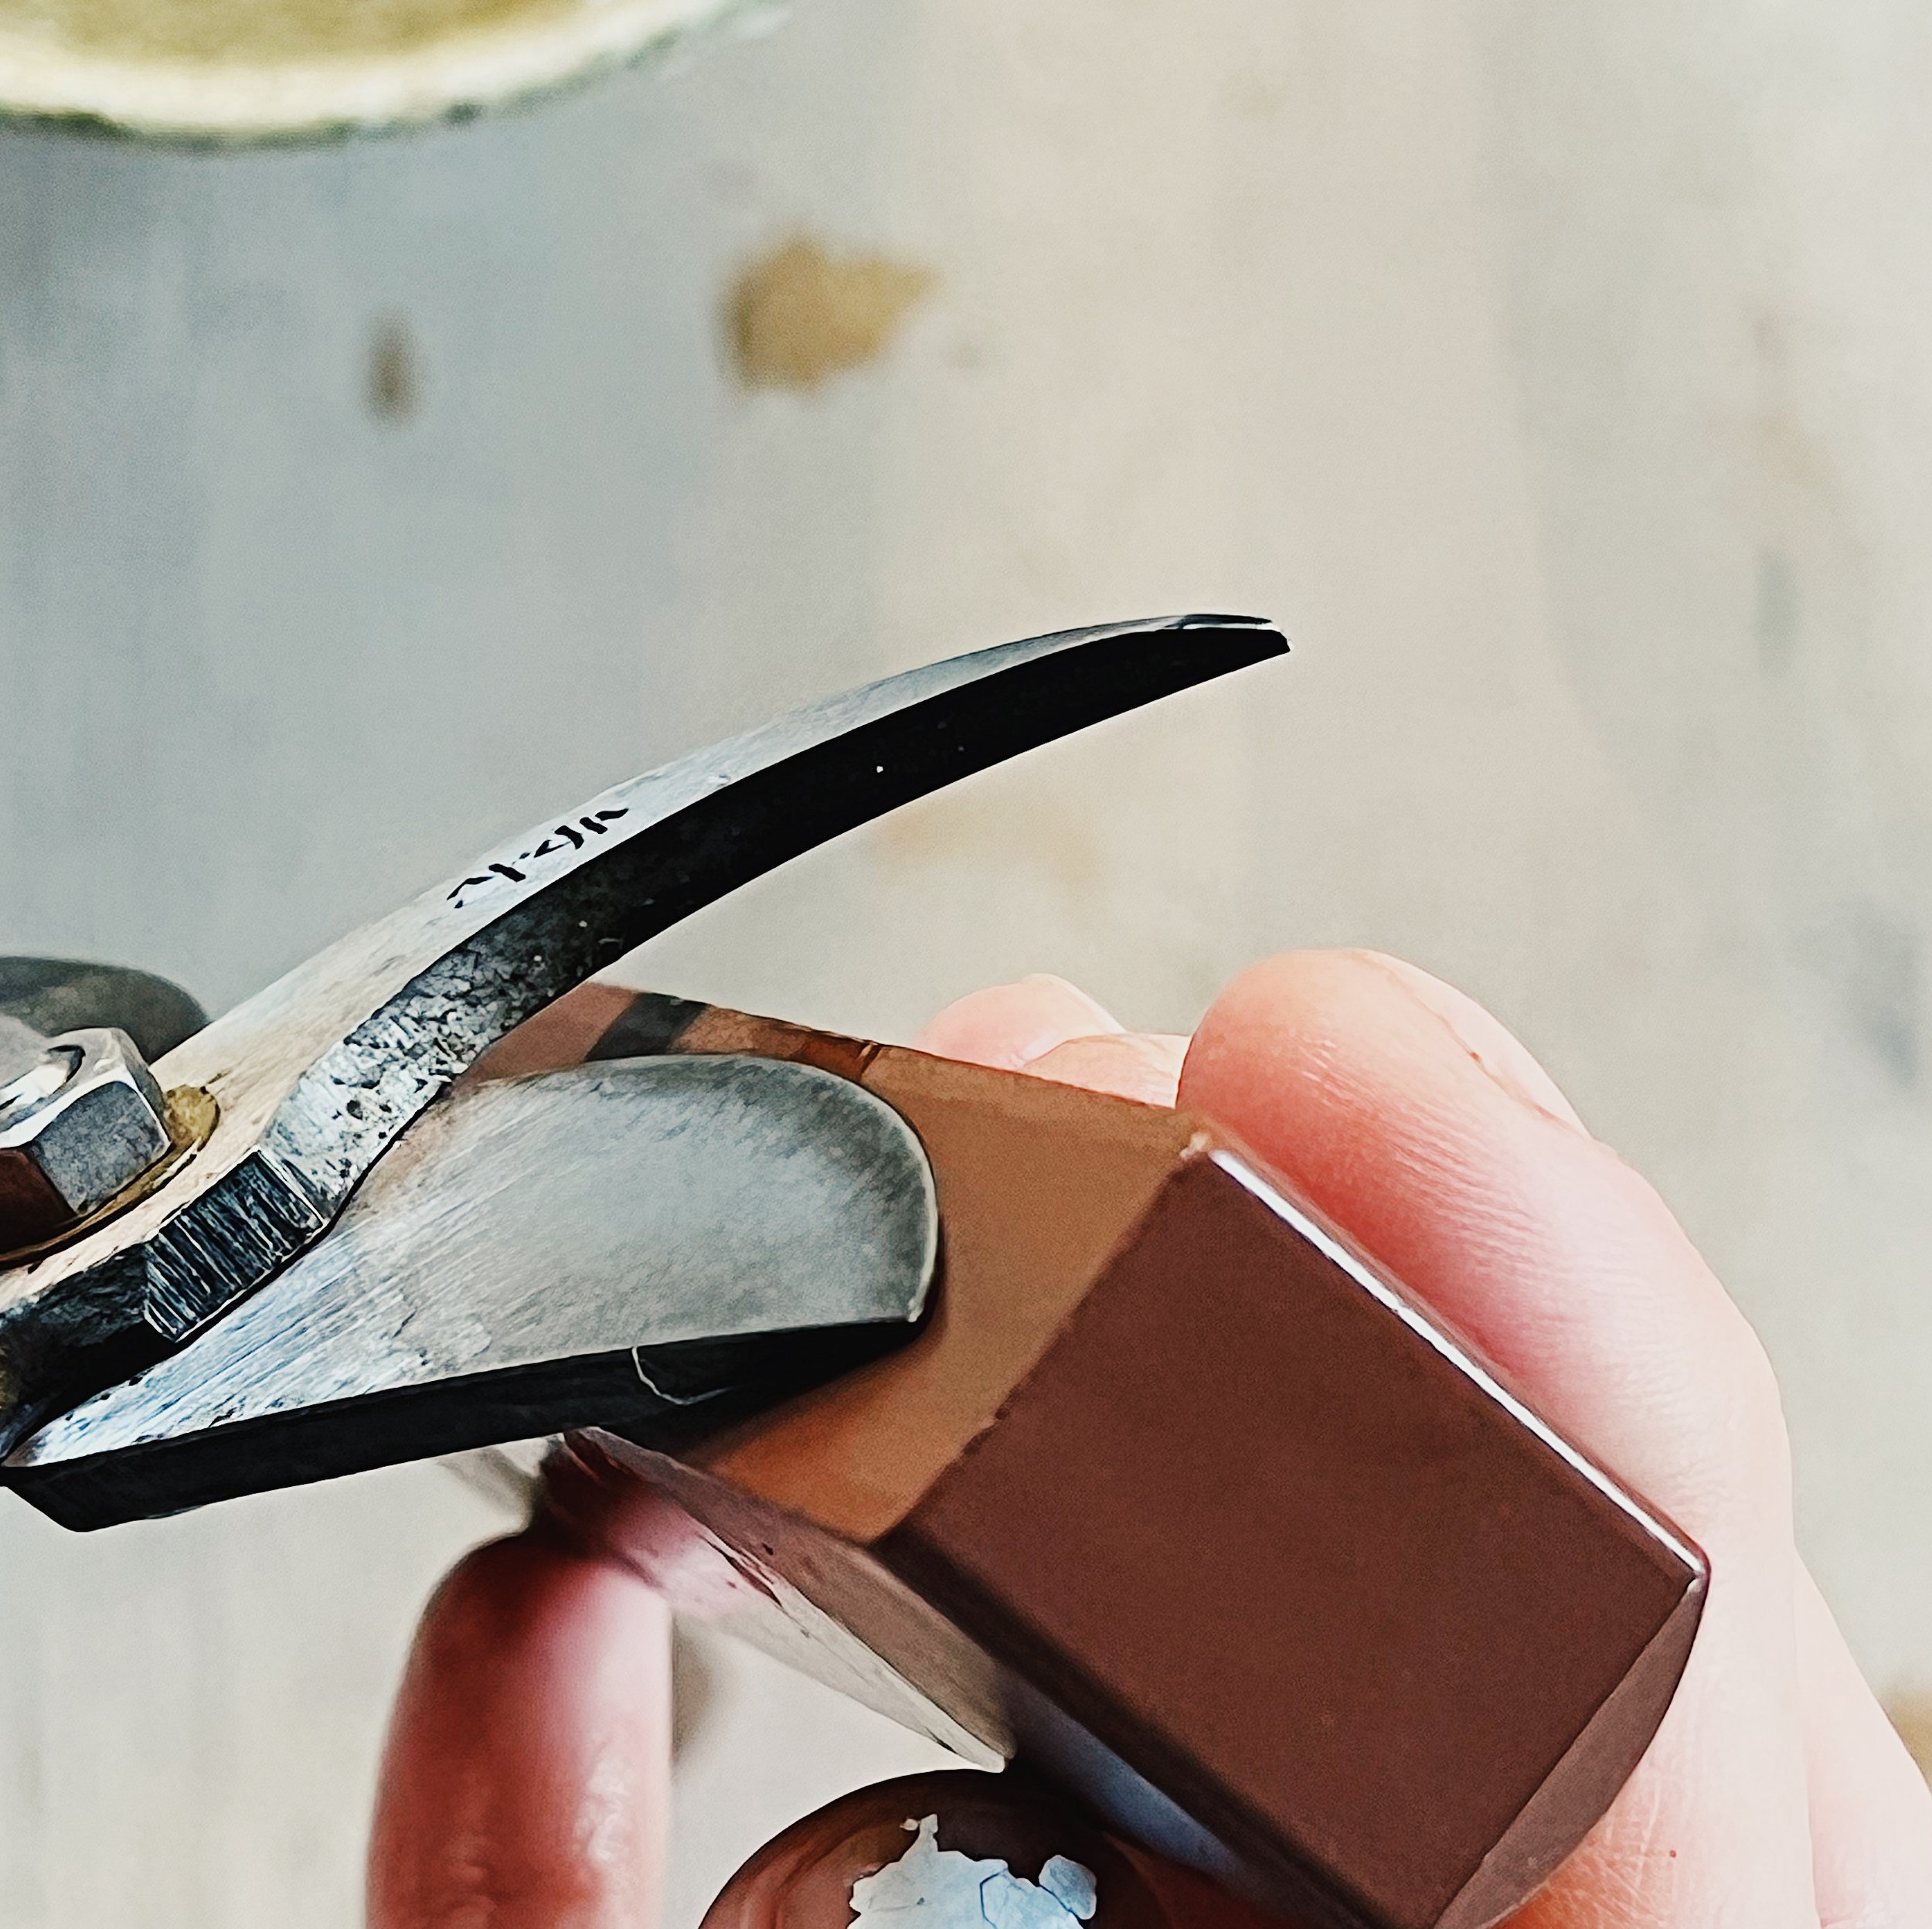
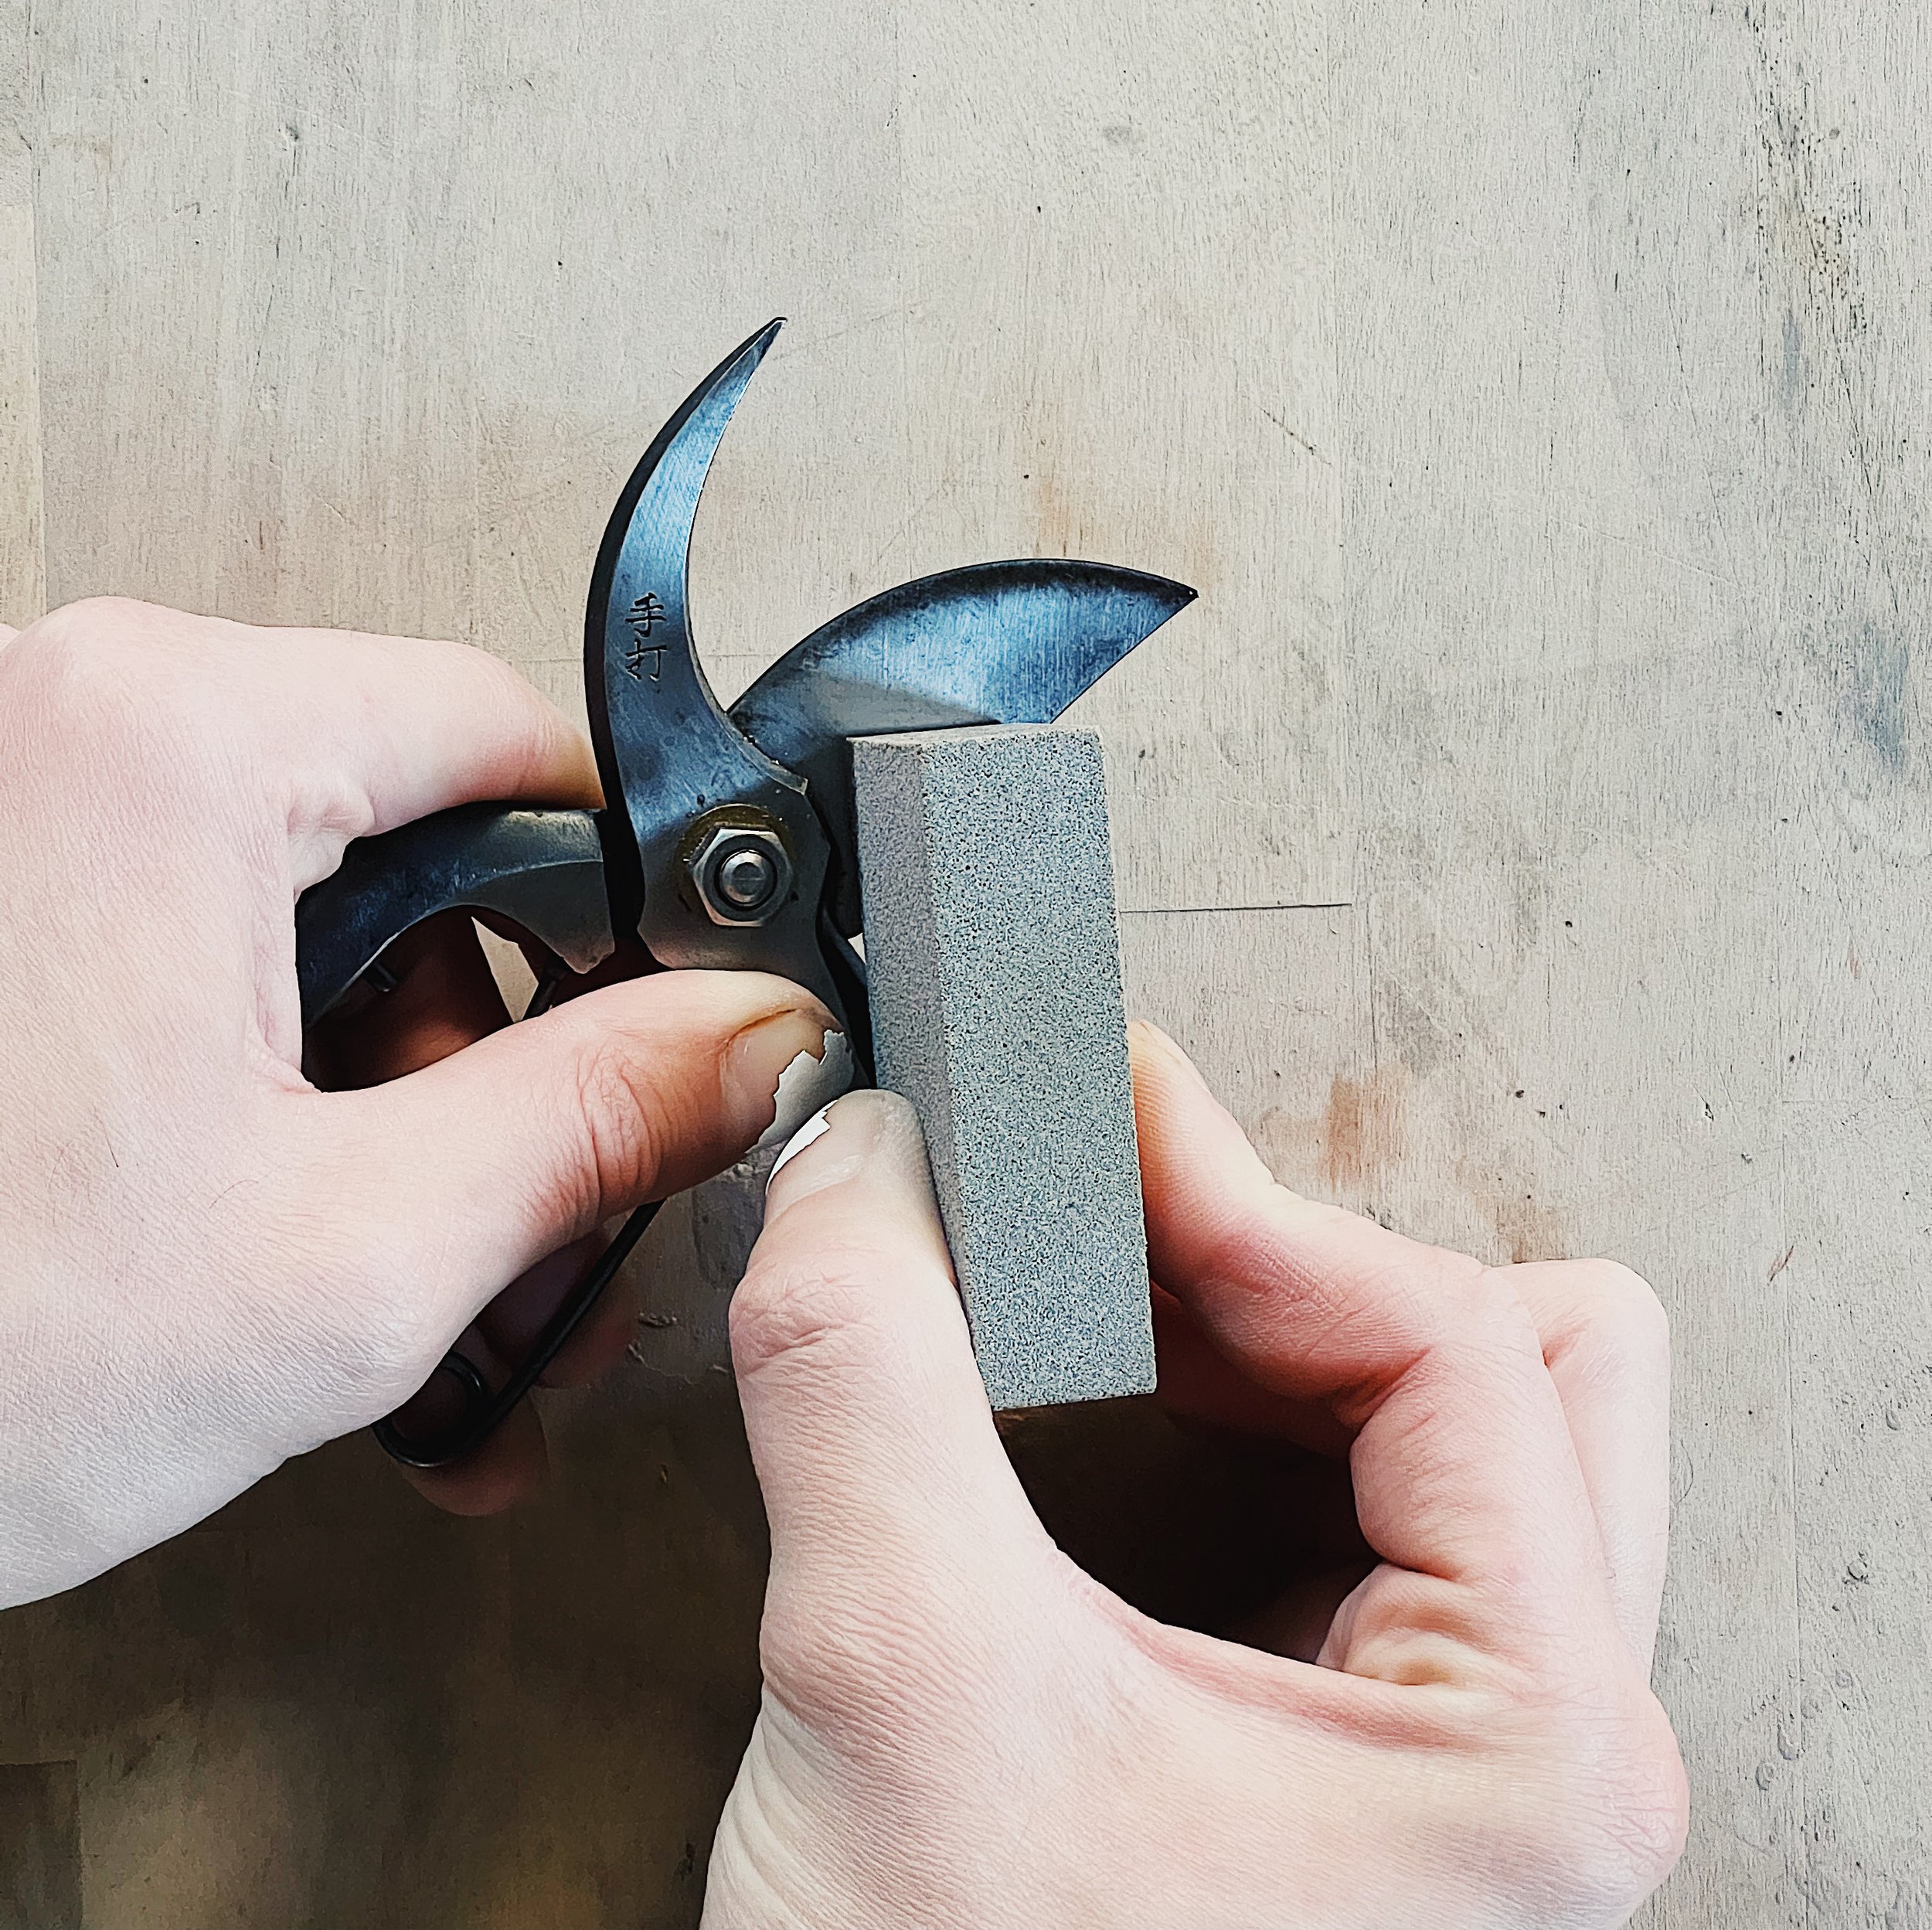
When working on a curved blade, such as a set of branch shears, many of the same concepts used on a flat blade apply here. A significant difference would be using the concave edge of your sharpening stone against the curved blade. Using just the weight of your tools, follow the edge of the blade along the curve of your stone. The blade should almost fit and slide down the curve when sharpening. Using the weight of the shears and allowing it to sort of “fall” against the curved stone can be an efficient way of guiding this motion. Start with the base of the blade and work toward the tip. Clean off the stone with your bowl of water, remove any hanging metal burrs off the back of the blade using a flat edge of the stone. Branch shears typically have a single blade so this step does not need to be repeated this session.
Checking Your Work
Depending on your comfort level, you may gently place a finger along the edge of the blade to gauge its sharpness. Be extremely careful! Placing the finger on the blade is dangerous enough, make no attempt to move, slide, or glide the blade. We can’t quite recommend taking a cutting for this step as plant discharge and sap will dirty your clean blades.
Nearing the end, ensure your sets of shears have completely dried. Any sitting water on the blades can quickly result in rust spots, keep this in mind both now and for the time between your next sharpening. Dry the blades and handles thoroughly with a towel. Open and close your shears to allow all residual moisture to escape from between the joint similar to before.
Aftercare and Safe Snipping Suggestions
Place your Crean Mate and sharpening stone on a clean towel to air dry completely before storage. Take small pieces of paper towels or a clean portion of your rag to lightly and evenly coat the entirety of your shears with camellia oil. Place a small drop on the treads of the bolt holding your shears together. Quickly open and close the shears to allow the oil to disperse and reduce friction on your shears.
When making future snips, stay within your shear’s means. Avoid taking heavy-duty or significant cuts when using bud shears. Do not use your garden shears on non-plant material such as paper, metal, fabric, etc. When making snips, aim for a diagonal cut as opposed to straight across. This allows the blades to snip plant fibers more individually as opposed to all at once, which requires less force from the user, and it is easier on the blades and your hands.
Text, Photos, & Video by: Sebastian Muñoz